
In-Person vs. Online Sales

Even the title here, In-Person vs. Online Sales, has a little bit of tension implied. This year while at Breyerfest, I caught a social media comment or two that echoed this feeling. 

 
My simple set up in my Clarion Room for in-person sales 


As an artist, I value every hobbyist who enjoys my work. That's why I create models—to share, to make someone smile, to bring a Stablemate-sized moment of joy. 

As a itty-bitty business, I create models to sell. I use the money I make to take care of my horse, Mr. Pots. He is 29 this year and needs medicine, special food, a farrier, a vet, and a dentist. He isn't living in my backyard any more so what I used to spend for a year of hay is now spent every month on board.

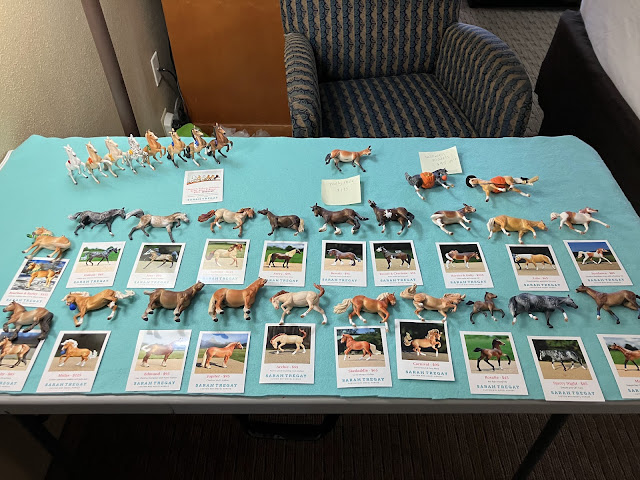
I'm going to be honest. I prefer to sell models in-person. 

As an artist, I want every customer to see the model before they decide to make a purchase. I want them to pick it up and turn it in the light. I want them to ask questions: what mold is this? what changes were made? what materials were used? I want them to be happy with the model they buy.

As a itty-bitty business, I prefer cash. I get to keep the money and not pay $3 to $7 in fees. 

Does this mean I don't value my online customers? Not at all. 

I have a website shop (https://sarahtregay.com/shop.html) that I update when I have models to sell. I ask that customers contact me via e-mail to inquire about a particular model and arrange payment and shipping. I ship overseas.

As an artist, I want those making online purchases to see the model the best they can. Try my best to show the model from many angles so you can see details like face markings and dorsal stripes. It's not the same as in-person, but I hope it helps in making the decision to buy.

So, preferences aside, I appreciate everyone who took a minute to look at my models at Breyerfest and/or to visit my website. Thank you. 

I will be updating my website soon. Please refresh your cache to get the latest version. 

Comments

Popular Posts

New Pan Pastels - An Update

A little while back I posted a photo of my new Pan Pastel colors. I've gotten a chance to use them, and have found them quite handy.      First, these colors are all useful—which is not something I say about many of the Pan Pastel colors because they are not all well suited for horses. The orange shade looks a little odd at first, but once it's part of the coat it softens to a nice, bright addition to chestnuts, palominos, buckskins and bays. I think of is as more of a golden tone than orange when the model is finished.      Second, they are easy to use—no sandpaper palette needed, no huge-jar-o-dust waiting to spill. The pans work with both paintbrushes and Microbrush applicators for small details like leg bars and dorsal stripes.     Third, the colors work well together and blend well. For example, on this model I used the Burnt Sienna Extra Dark to deepen a few areas I had dusted with the Burnt Sienna Shade. So... thes...

A Golden bay in Pan Pastels

I thought I'd share a bit of my process. I'm working in Pan Pastels. The model in question is a simple custom Morgan Stallion from the new standing Stablemate Warmblood mold. He has had some work done on his barrel and hindquarters. His mane and tail have been changed as well.  I prepped him with Rustoleum 2X primer in white and taped off some white markings with blue painters tape. Feel free to follow along and paint your own golden bay or liver chestnut.  A Pan Pastel Project Art Supplies Shopping list: A model with sanded seams and logo removed 400 Grit Sandpaper Masking or painters tape (optional) Rustolem 2X Primer Pan Pastels: 280.3 Orange Shade, 820.2 Neutral Grey Extra Dark (or other neutral grey), Layer 3: 740.3 Burnt Sienna Shade, 740.1 Burnt Sienna Extra Dark, 800.5 Black. Pan Pastel optional colors for shading mane, tail, and white markings: Optional fleshy pink pastel or paint for a pink nose or shading white markings. Krylon Matte, Testor's Dullcote, or other ...

Performance Bases with Kinetic Sand

I am getting ready for the Save The Tigers Model Horse Show on Saturday, and I thought I'd spiff up my performance entries a little with arena bases. My goals here were to keep to a small budget and a manageable size. For the first one, I found a wall hanging at Walmart—a picture frame without glass or a matte for about $5.00. I removed the hook from the back so it would lie flat on the table and a clip from the front. I also found a 3 lb. bag of kinetic sand for $13.00. (Regular sand can be done, but I usually make a mess of it.) Honestly, I'm a little worried about sand scratching my models, but it does look neat. The fence is made of hobby wood (the small Popsicle sticks) and is removable for easy, flat storage. It stands 1 3/4 inches above the edge of the arena. Just a note, I steer clear of balsa wood because it is so fragile. Picture frame base about 6 x 8.5 inches. 3 lbs of kinetic sand isn't a lot. Quick! Unlike regular sand, kinetic sand h...