I hope everyone is safe and healthy during these difficult times. I’m saddened that we won’t be gathering for spring live shows and this summer’s Breyerfest. I’m going to miss getting together with amazing friends in Michigan, Ohio and Kentucky. Until things change, thanks to everyone sharing their corner of the hobby world online!
I needed a creative jolt to get me out of a quarantine funk, so I opened up my package of sculpting mesh. My victim is a Paralympic Driving horse that will become a Fjord custom. Harald, my previous Fjord, is from the same mold. His mane was a challenge for me because of the upright nature of it... so the contour mesh.
 |
| Look for fine sculpting mesh at stores or online art-supply vendors. |
 |
| Slot along crest of neck cut with small miter saw. |
First, I cut a slot along the crest. This will hold the mesh in place. Then I cut a piece of mesh to fit. I left plenty of extra that I will trim and shape later. Scissors cut the mesh just fine, but please be careful of sharp edges and scraps.
 |
| Wire mesh placed in slot. Note plenty of extra mesh. |
I then superglued the mesh in place.
 |
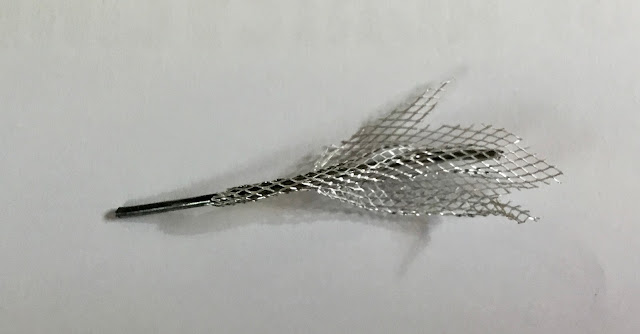
| For the tail I started with 16 gage steel wire. |
With a sharpie, I marked how long I wanted it to be (from base of tailbone to the hock if hanging straight down). Then, leaving plenty of extra wire, I cut it. I also cut a random piece of wire mesh.
 |
| Pieces of the tail. |
 |
| Mesh folded over wire to start a tail shape. |
 |
| Shaped and trimmed with scissors. |
 |
| Side view before I superglued the two together. |
 |
| Progress so far... |
After the glue had time to cure (I always wait a hour or more because I hate superglue on my fingers). I mixed up some two-part epoxy. I’m using white Magic Sculpt. First I coated one side of the mesh in a layer of epoxy.
 |
| Underside of wire-mesh tail with epoxy added. |
 |
| Shaping underside of tail. |
For the mane, I trimmed the mesh to be the length of the center (black) portion. I added epoxy to that as well. The horse now has a hole in her hindquarters where the tail will be glued in place. (I have more sculpting and sanding to do before I glue it.)
 |
| Mane trimmed to shape. One side has epoxy on it. |
 |
| Epoxy over wire on one side only. Working one side at a time keeps me from mushing the details. |
At this point the tail is not attached to the body. This gave made it easier to sculpt and sand both the tail and the hindquarters, although I didn’t want to work on the tailbone area of the tail too much.
 |
| After three sculpting sessions (with dry time in between) the wire mesh is covered. |
Since I’m experimenting with armatures to assist with the sculpting, I thought I’d try tiny armature wires for feathers and the forelock. And things are looking pretty silly...
QUICK TIPS:
1. Sand tail and hindquarters before attaching the tail. You can even file the wire mesh.
2. Adjust the height of tail to match speed (or a breeze) by bending the wire part.
3. Choose gel super glue. (So it doesn’t drip into those hard-to-sand areas on the hind legs.)
 |
| This gel superglue blob is going to be easier to clean up than a drip. |
 |
| Folded paper “ruler” |
QUICK TIP 2: Sketching on your model is perfect for planning where sculpting should go.
Fjord manes are perfect for showcasing creativity. I’m going to try a pinking shears pattern on this girl. To divide the mane into even sections, I cut a piece of paper and folded it over on itself several times. Then I marked the folds so I could see them. Holding the paper up, I transferred the marks to the horse. This made my design easier to draw on both sides.
 |
| Sketch of mane design. |
 |
| Adding a second layer of mane to one side, this layer has a design cut to shape with Exacto knife. |
 |
| Added texture to geometric part of the mane. |
 |
| Wire armature on the forelock. |
Wire mesh? I will be using it again! I liked how I was able to reposition the mesh while I was sculpting with the epoxy. I could also trim it when it was covered in epoxy. The mesh held the epoxy securely, unlike a wire armature where the epoxy can slide off the wire. I also feel that the wire mesh will aid in a long life for any model. It won’t age like masking tape or crumble like baking powder concoctions. It will add to the strength of a mane or tail that might get bumped on a show table.
Wire mesh? Is it without issues? Nope. I did sand through the epoxy in a few areas and exposed the mesh. Some of my sculpting was lumpy at first... because of the mesh pattern. And the edges are pokey!
Overall? I’ll be adding wire mesh to my customizer’s toolbox.
 |
Tansy, the finished mare.
|


Comments
Post a Comment