I’ve finished customizing a Connemara Pony from the jumper mold (with a G1 Morgan Stallion head), but before I paint her, I’ll focus on tack, doll and jump to complete the picture.
 |
| Bits and pieces of my project. |
Because I want my pony to appear petite (14.2 ha) I am scaling up the items around her. From the size of the jump to the adult rider, I’m hoping she’ll look like the pony she is, not a big warmblood. My ratio is 1 foot equals .425 inches.
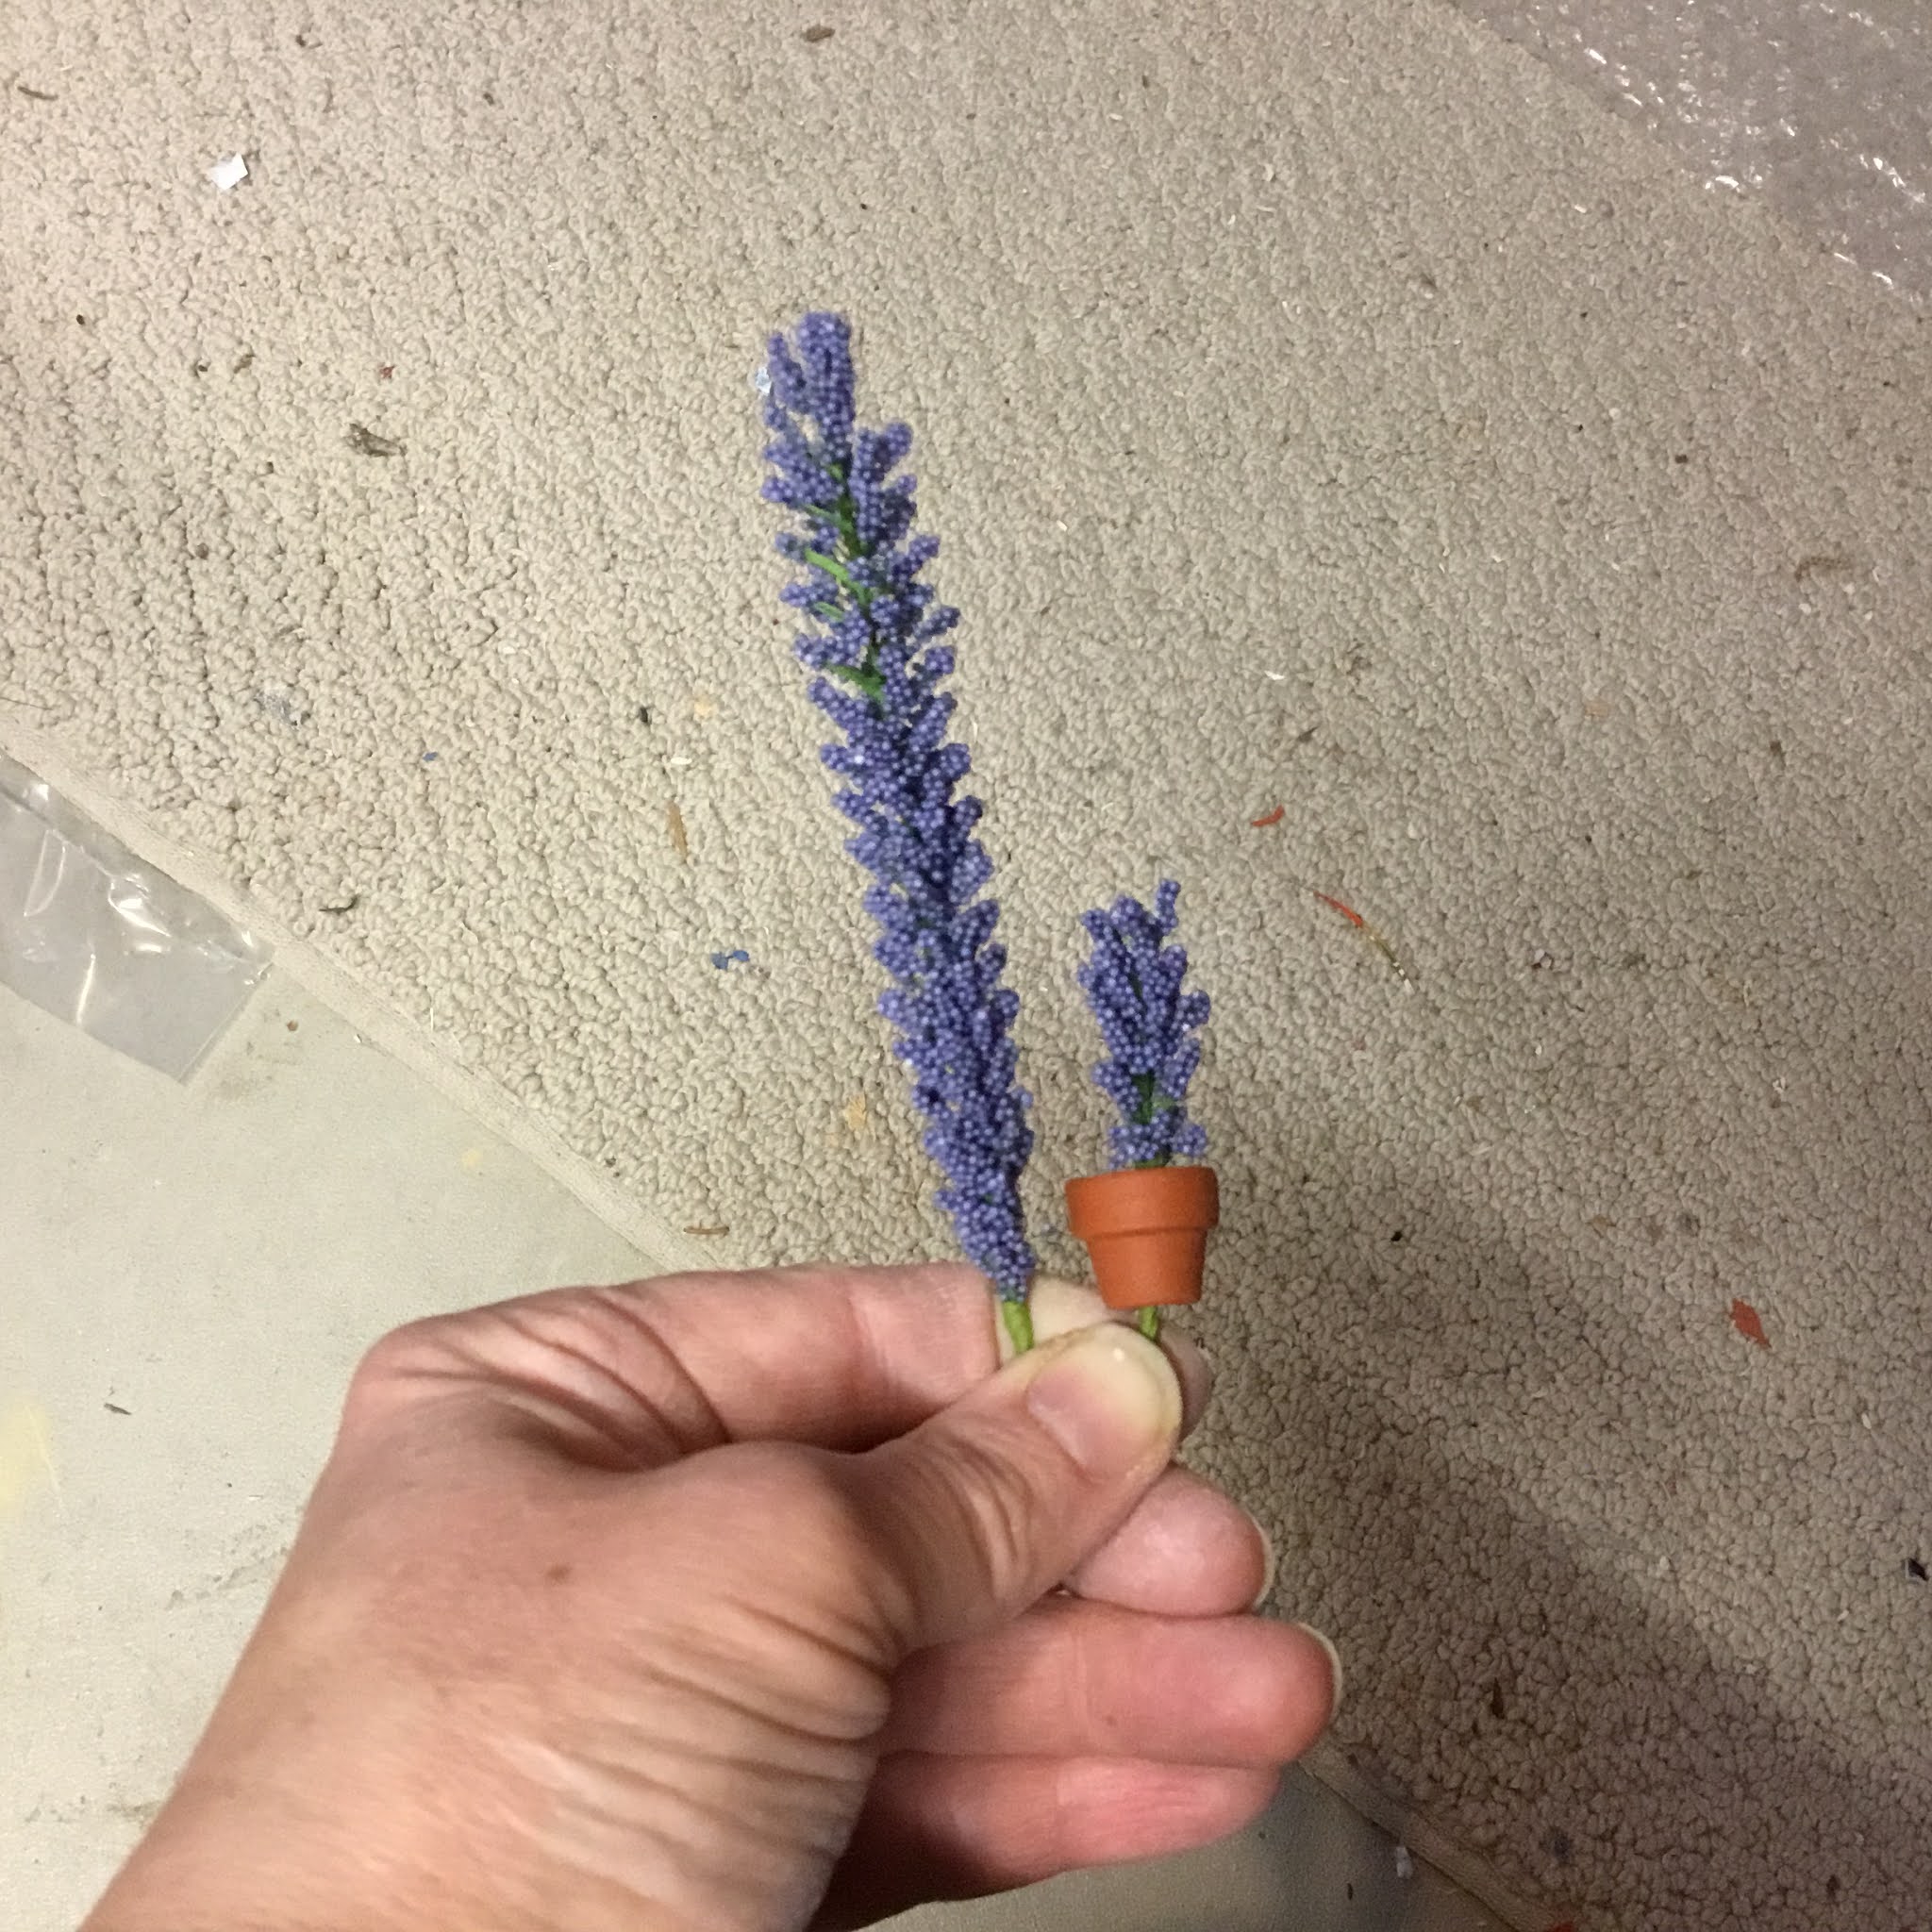
My first project to tackle is the plants that will decorate my jump. Today’s hunter fences have lots of “fill.” For this I purchased a bouquet of fake flowers with small-scale components. I’ve trimmed off some pieces to use—and found that some unraveled completely!
 |
| Fake flower bouquet with small components. |
For my flower boxes, I began with 1/4 inch square dowels and cut them to about 4 inches long. I painted them with craft acrylic paint and sprayed with matte finish. For the greenery, I used coarse turf that’s used in model railroads. Coating one side of the dowel in glue, I dipped it in the turf.
 |
Stablemate scale flower boxes.
|
Next, I added tiny bits of “flowers” from my unraveled bouquet.
 |
| Breyer SM flower boxes. |
For potted plants, I chose two types of pots: mini terra-cotta ones from a craft store and plastic caps from horse dewormer packages. The plants are trimmed from my bouquet. Filling with two-part epoxy gives them weight and holds the plants in place.
 |
Flowering trees before and after a trim. Dab of glue needed so it won’t unwind.
|
 |
| Stablemate flowerpots in progress. |
To make the poles, I started with a 1/8 inch round dowel. I painted it and sprayed it with matte finish. When it was dry I cut into 8 poles about 4 1/4 inches long. Because these are hunter jumps, I left them a solid color.
 |
| Still deciding on jump standard design... |
I’ve decided to try three types of standards. The first will be a wishing well with a little roof (to go with the faux stone wall. The second will be a standard standard with angled boards and the third a brick pillar with an angled top.
I think 5 ft tall standards will work for a pony hunter class. So I’ll work with a height of 2 1/8 inches.
 |
| Wishing well, regular standard, and a pillar all in process. |
Here they are in process, the wishing well had some seams where the uprights met the roof, so I’ve used Bondo spot putty to fill the gaps. The standard in the middle still needs feet so it will stand. And the brick pillar will have a piece added so there will be a place for the jump cups to attach. The bricks on the brick items are model railroad plastic/paper glued to wood. I may also need a single upright in order to make these jumps an over.
I am making my own jump cups for this project. I start with sheet metal from a big-box home improvement store (a heating duct or pipe cut flat). The metal is like a thick aluminum roasting pan or pie pan from the grocery store. I cut the metal with scissors and bend it using smooth, flat pliers. The edges are knife-sharp. The scraps are dangerous for pets and bare toes so I always trim directly over the trash.
Here are the steps to making the jump cups:
 |
| Make your own model horse jump cups in seven steps. |
For more realism it may be possible to drill holes in the cups and standards to add pins, but I’m not going to tackle that at this time.
 |
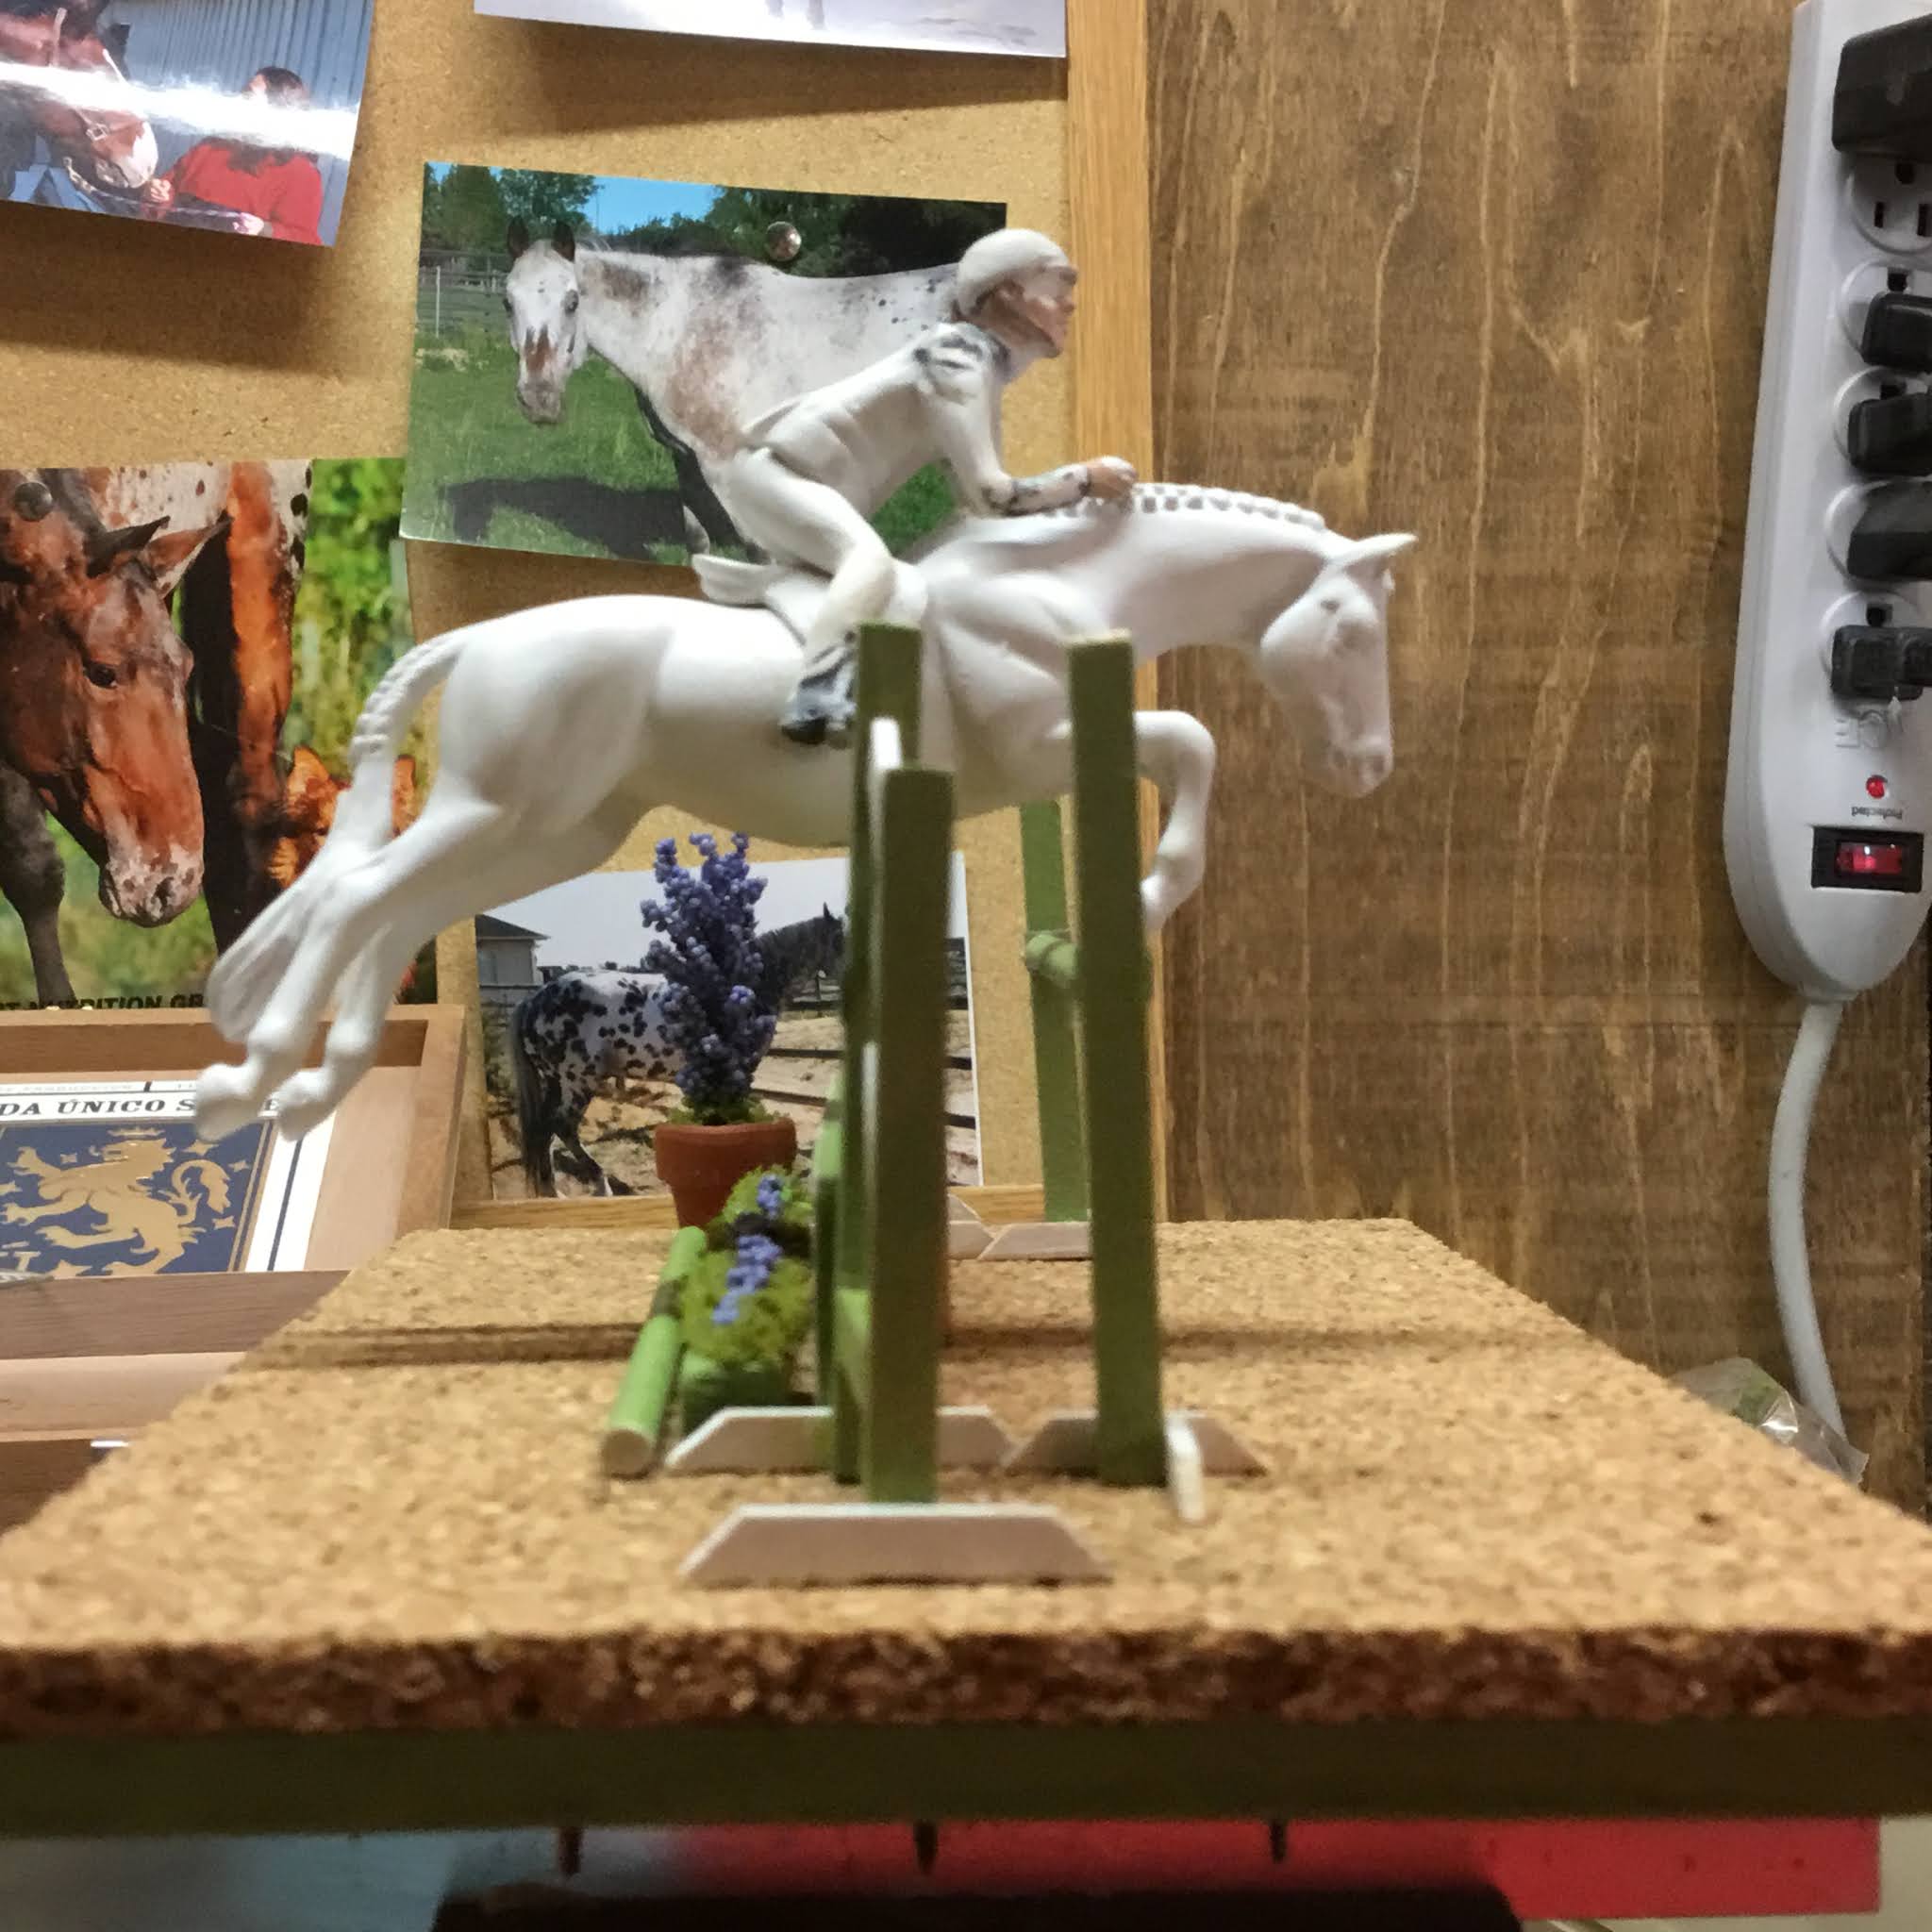
Testing the horse and the jump together with base.
|
 |
| Plexiglass rod is holding the Stablemate in position. |
With a jumping model, the position of the horse in relationship to the jump is important. Here I drilled a new hole in the horse’s belly to accommodate a plexiglass rod in the middle of a wood and cork base. Next, I’ll work on refining the height and angle of the horse’s arc.
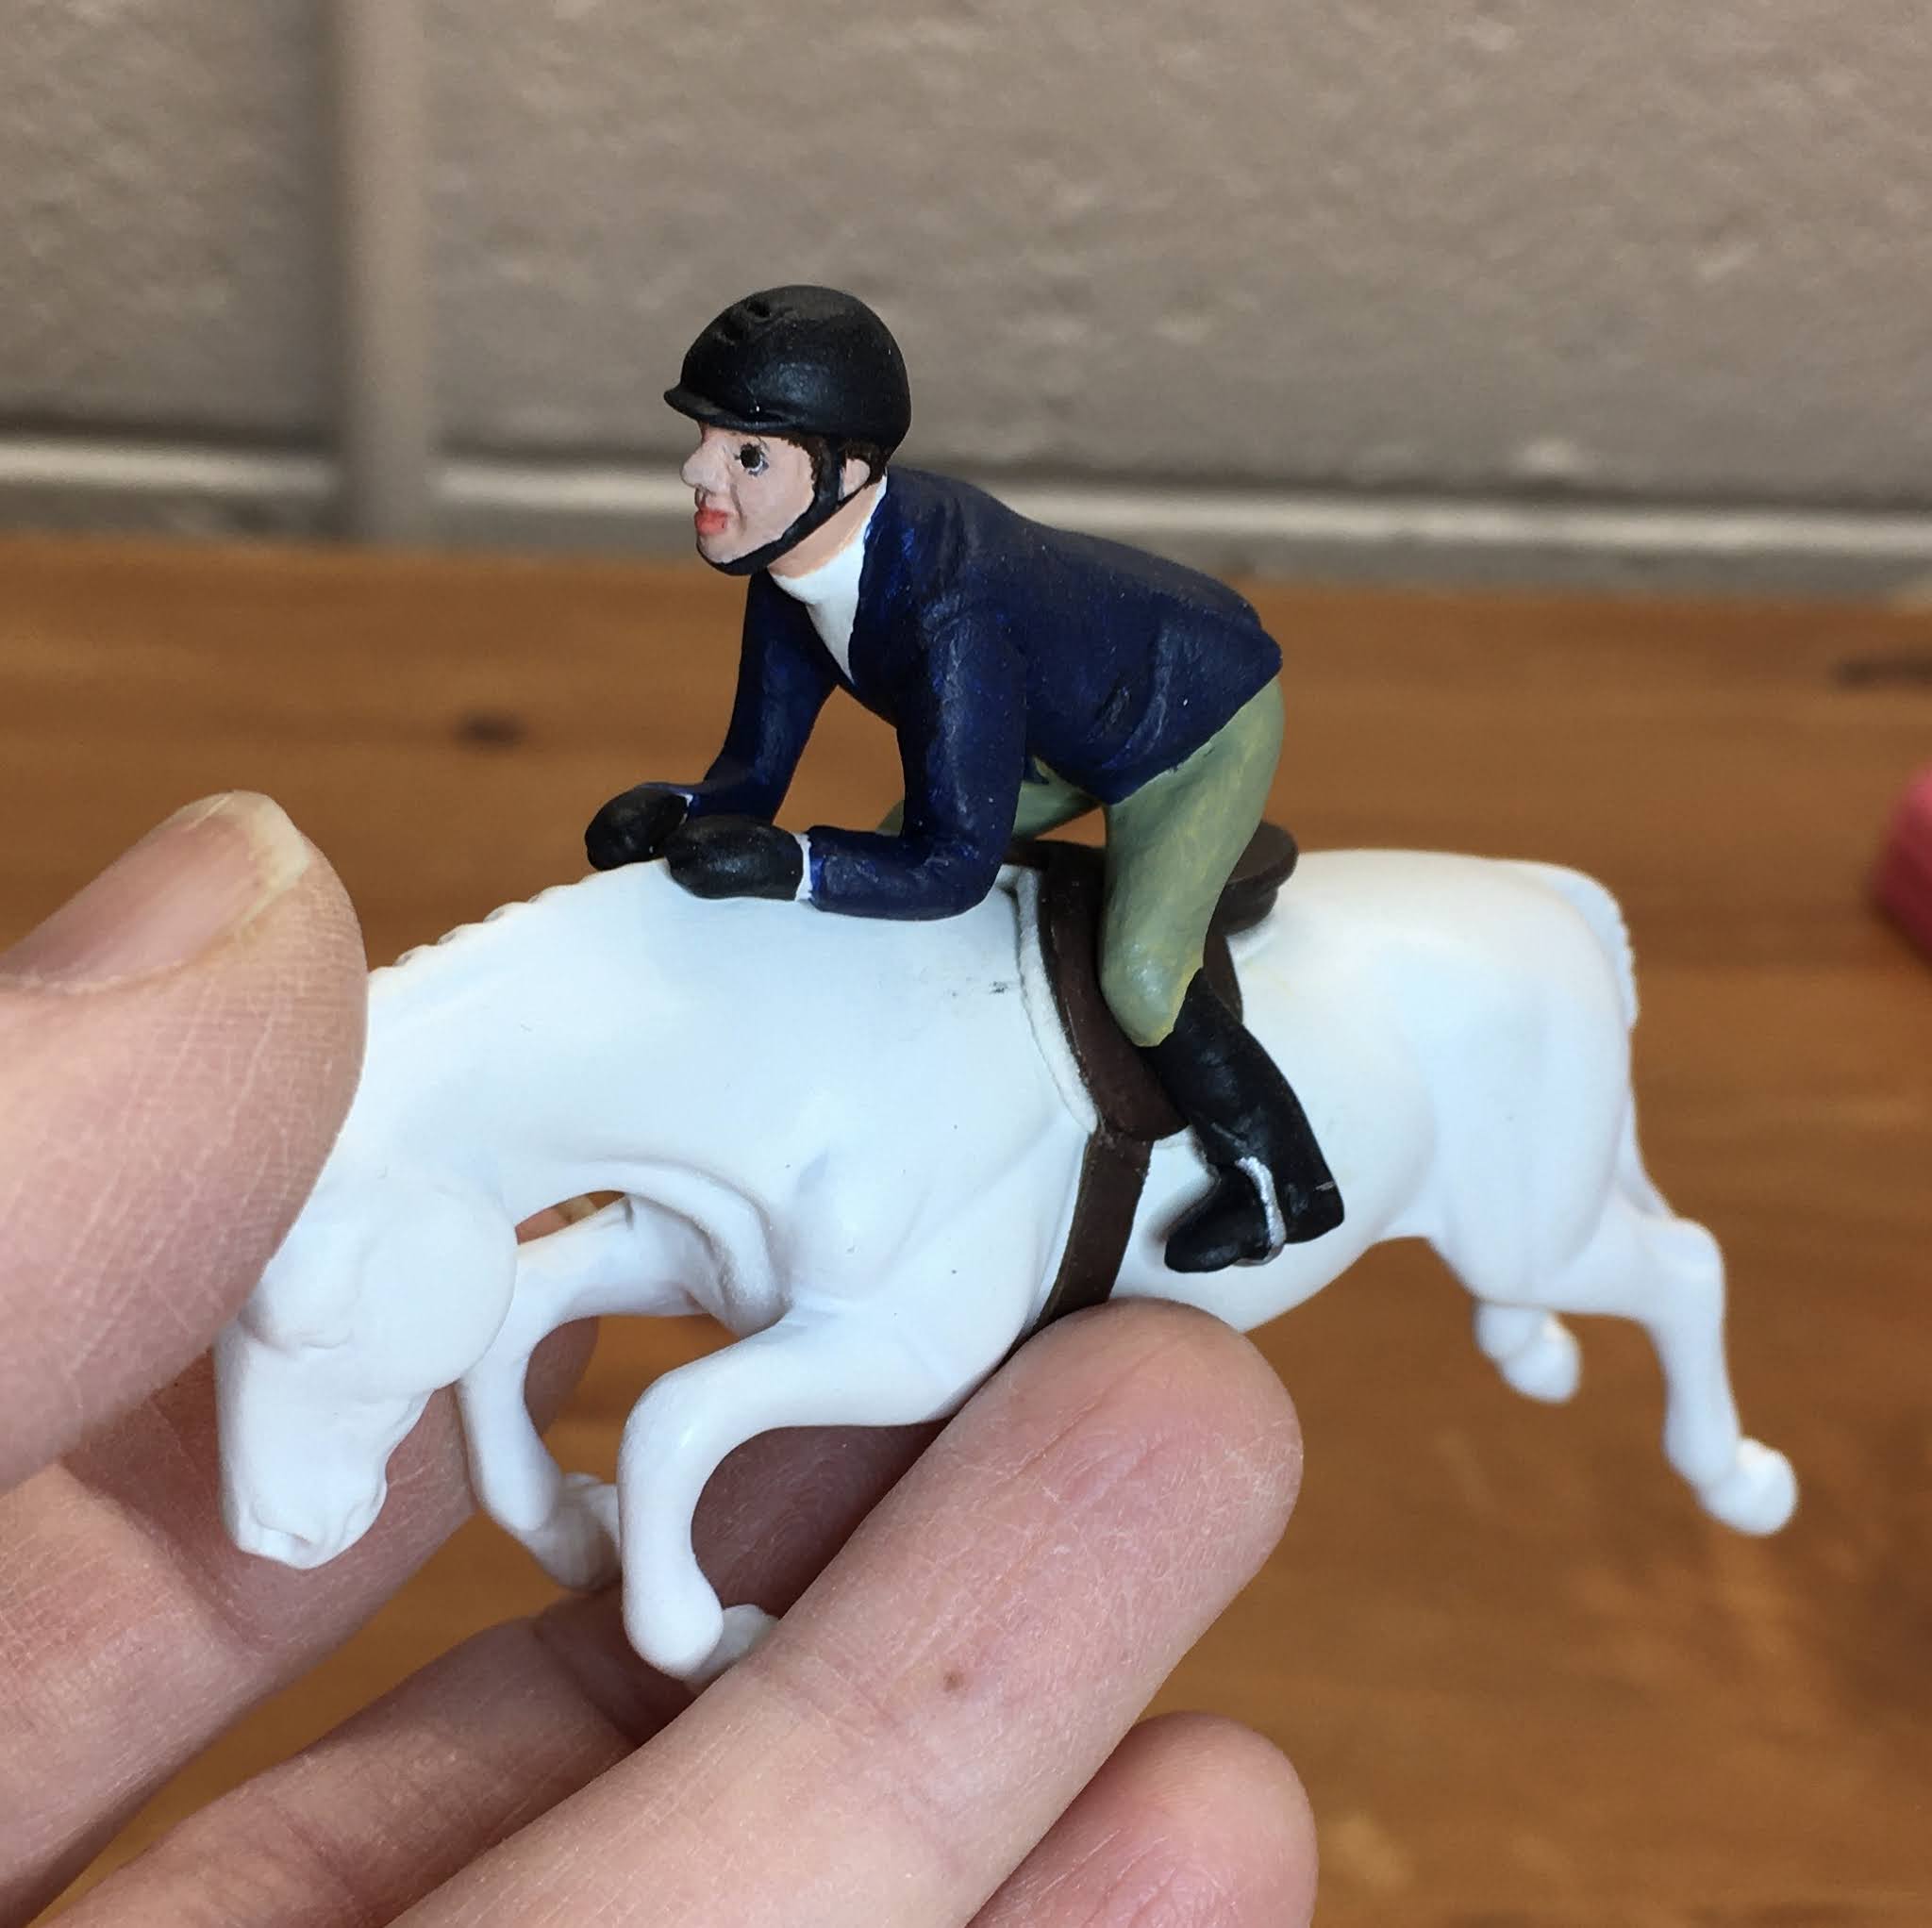
I’ve painted the saddle and rider! The saddle is sculpted from epoxy and painted brown with a ultra suede saddle pad and leather lace girth. Now it’s looking a little more realistic:
 |
| Stablemate ornament jockey customized to a hunt seat rider. |
 |
| Stablemate rider in blue hunt coat and greenish khaki britches. |
My Rio Rondo goodies are here: itty bitty buckles and bits plus kangaroo leather lace. I need to make a bridle and martingale before I paint my pony.
 |
| Stablemate scale etched items from Rio Rondo. |
 |
Hunter Derby Entry for Other English Breyerfest Open Show 2022
|
 |
Adult Amateur Hunter 3 ft
|
 |
Hunt seat Equitation
|
 |
Breyerfest 2022 Open Show English Performance Call Backs
|


Comments
Post a Comment