 |
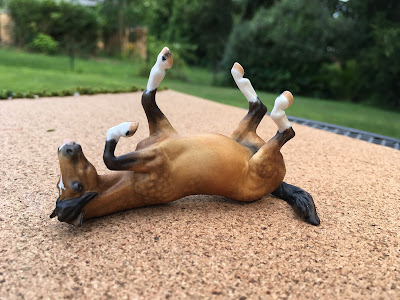
| Cascade, a custom mini gelding that sold quickly. |
As the holidays come closer and the emails from Breyer fill my inbox, I've seen an uptick in artists asking the question: Why aren't my models selling?
It might be timing. Or price. Or potential customers not seeing your advertising. Or potential customers not having money to spend.
It might be the photography. Or the background. Or the angle. Or the lighting. Or the number of photos. Or the location/website hosting said photos.
It might be the model.
Gasp! I know. It sounds rude.
But not every model I sculpt is perfect. Not every paint job glows. Just like not every novel I write is a New York Times Bestseller. And not every meal I cook tastes great.
 |
| Peter Pan (and Shadow), a stallion I just finished for my collection |
As an artist, I choose to create models that I want to create. I don't take commissions, just ideas I love and that inspire me.
This can be a problem when it comes to selling my art. Maybe I have chosen a mold only I like. Maybe I have painted forty-five chestnut mares this year and my potential customers yawn when they see the forty-sixth one.
I might never sell that forty-sixth redhead. I might add her to my curio. Or add her to my show string. And that's okay. Because every model is an opportunity. Every time I sculpt, prep, or paint I am practicing, learning and improving.
So maybe the next model will have more accurate anatomy, a more realistic paint job, a more charming personality.
Maybe that model will sell.
 |
| Maybelline, a mare that just doesn't photograph well but looks cute in person. |
A few things to think about when creating models that you hope to sell:
Ask questions/make a poll: Which OF or resin molds do customers love right now? What type decorator models are customers interested in? What are their favorite colors?
Research/plan ahead: What breed is the horse? What coat colors occur in those bloodlines? Some customers like to choose their own documentation. Some do not. They want a model they can show. I would recommend marking the page/keeping a link to your references to share with a potential customer. (Remember that the photographer owns the rights to their work, so simply share the link, not the photo itself.)
Become aware of other artists' work and how much they charge: Pricing can vary a lot. One artist may be selling a beautiful custom with great photos for $35 while another might have something similar for 10x or 100x the price. Consider your own pricing strategy. Maybe even price your models like an artist who does similar quality work who has been customizing for the same length of time.
Consider a critique: Artists and writers constantly have their work critiqued. Look for someone you trust who has knowledge of horses. Maybe ask a judge or fellow shower, or an artist you admire. It's also okay if they decline.
Consider commissions: Making a model someone wants is more likely to end in a sale. Check in with the customer throughout the process to stay on the same page.
 |
| Lacie, a mare I created for a customer who loved this mold. |
Consider white labels: Maybe you are a great sculptor, but your paint jobs just don't sell. Sell models prepped and primed.
 |
| An unpainted mule I sold to a friend |
Invest in your photography: Take time to learn what makes a good photo/photo gallery. Purchase new equipment if you must.
Think about your audience: Where do they shop? Facebook? Instagram? The local tack shop or toy store? Etsy? Ebay? MH$P? MHP? Mercari? Your website store? At Breyerfest? At local shows? Create a strategy to reach them. Try something new.
Consider the whole experience: Be the person you would want to purchase all your models from.
 |
| Toot Suite, a filly that sold at a live show |
Well said! Thank you! :)
ReplyDeleteThanks. It's a tricky topic to talk about.
ReplyDelete